 Embarking on Your DIY Shower Tile Journey: The Basics
Understanding the Importance of a Well-Tiled Shower Floor
A well-tiled shower floor is not just about aesthetics; it’s a fundamental aspect of a functional and durable bathroom. This section emphasizes the significance of a properly tiled shower floor in maintaining hygiene, preventing water damage, and enhancing the overall ambiance of your bathroom.
Introduction to DIY Tiling and Its Benefits to Homeowners
Introducing the world of do-it-yourself tiling, this section explores the empowering benefits for homeowners. From cost savings to customization opportunities, discover why taking on the challenge of tiling your shower floor can be a rewarding and practical endeavor.
Essential Tools and Materials for Shower Floor Tiling
Before delving into the practical aspects of tiling, equip yourself with the essential tools and materials required for a successful project. This section provides a comprehensive list, ensuring you’re well-prepared for each step of the tiling process.
Tools and Materials for DIY Shower Tile Installation:
1. Tools for Preparation:
- Measuring Tape: Accurate measurements are crucial for precise tile placement.
- Level: Ensures a flat and even surface for tiling.
- Carpenter’s Square: Useful for checking corners and ensuring right angles.
- Bucket and Sponge: Essential for cleaning and preparing the surface.
- Chalk Line: Helps create straight guidelines for tile placement.
2. Tools for Tile Installation:
- Notched Trowel: For spreading mortar evenly on the surface.
- Tile Spacers: Maintain consistent gaps between tiles for grouting.
- Rubber Mallet: Ensures tiles are firmly set in the mortar.
- Tile Cutter or Wet Saw: Cuts tiles to fit around edges, corners, or fixtures.
- Tile Nippers: Ideal for shaping tiles to fit irregular spaces.
3. Materials for Preparation:
- Broom and Dustpan: To remove debris and ensure a clean surface.
- Patching Compound: Fills in any cracks or imperfections in the substrate.
- Waterproofing Membrane: Essential for creating a water-tight foundation.
4. Materials for Tile Installation:
- Tiles: Choose appropriate tiles based on material, size, and design.
- Mortar: Thin-set or mastic, depending on the type of tiles.
- Grout: Select the appropriate type and color for a polished finish.
- Tile Adhesive: Ensures a secure bond between tiles and the substrate.
- Tile Sealer: Protects tiles from stains and moisture penetration.
5. Tools for Grouting and Sealing:
- Grout Float: Spreads grout evenly and presses it into spaces between tiles.
- Grout Sponge: Wipes away excess grout during the grouting process.
- Grout Brush: Ideal for cleaning grout lines and removing residue.
- Caulk Gun: Used for applying caulk around edges and corners.
- Tile Sealer Applicator: Ensures even application of sealer.
6. Safety Gear:
- Safety Glasses: Protects eyes from debris during cutting and installation.
- Dust Mask or Respirator: Provides respiratory protection from dust and fumes.
- Knee Pads: Offers comfort and protection during floor-level work.
7. Miscellaneous:
- Pencil: Marks guidelines on tiles for cutting and placement.
- Tile Layout Tools: Such as a chalk line or laser level for precise alignment.
- Thin-Set Adhesive Spreader: Ensures an even application of adhesive on the back of tiles.
Note: This list is a general guideline, and the specific tools and materials needed may vary based on the type of tiles, substrate, and individual project requirements. Always refer to the manufacturer’s recommendations for the materials being used.
Preparation: Laying the Groundwork for Success
Measuring and Planning Your Space
Begin your journey by laying the groundwork for a well-executed tiling project. Learn the importance of accurate measurements and strategic planning, ensuring that your shower floor tiling project starts on the right foot.
 Choosing the Right Tiles for Your Shower Floor
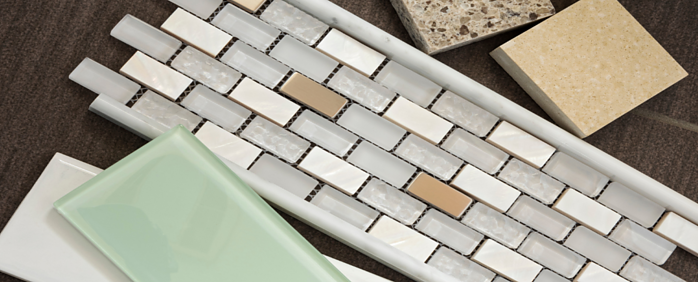
Explore the vast world of tile options and select the right ones for your shower floor. Consider factors such as material, size, texture, and slip resistance to make informed choices that align with both your aesthetic preferences and practical needs.
- Ceramic Tiles:
-
- Characteristics:
-
- Durable and resistant to scratches and stains.
- Water-resistant, making them suitable for bathrooms and kitchens.
- Available in various colors, patterns, and sizes.
- Affordability makes them a popular choice for many applications.
- Porcelain Tiles:
-
- Characteristics:
-
- Extremely durable and resistant to wear and tear.
- Low water absorption, suitable for high-moisture areas.
- Mimics the look of natural stone or wood.
- Ideal for both indoor and outdoor applications.
- Natural Stone Tiles:
-
- Characteristics:
-
- Varied options include marble, granite, slate, limestone, and travertine.
- Unique and natural aesthetics with distinct veining and patterns.
- Each type has different hardness and durability levels.
- Requires proper sealing and maintenance to prevent staining.
- Glass Tiles:
-
- Characteristics:
-
- Reflective surface adds depth and luminosity to spaces.
- Resistant to water and stains.
- Ideal for creating vibrant and modern designs.
- Available in various shapes, sizes, and colors.
- Terracotta Tiles:
-
- Characteristics:
-
- Made from fired clay, offering a rustic and earthy appearance.
- Naturally porous and may require sealing to resist moisture.
- Warm and inviting, suitable for Mediterranean or farmhouse styles.
- Requires regular maintenance to preserve its appearance.
- Travertine Tiles:
-
- Characteristics:
-
- A type of limestone with a distinctive porous surface.
- Natural color variations create a warm and timeless look.
- Commonly used for flooring and wall applications.
- Requires sealing to protect against stains and moisture.
- Granite Tiles:
-
- Characteristics:
-
- Extremely durable and resistant to scratches and heat.
- Natural stone with unique patterns and colors.
- Suitable for high-traffic areas like kitchens and hallways.
- Requires periodic sealing for maintenance.
- Slate Tiles:
-
- Characteristics:
-
- Metamorphic rock with a natural cleft surface.
- Rich, earthy colors and textures.
- Slip-resistant, making it suitable for wet areas.
- Ideal for both indoor and outdoor applications.
- Marble Tiles:
-
- Characteristics:
-
- Elegant and luxurious with unique veining and patterns.
- Prone to scratching and staining, requiring proper care.
- Ideal for bathrooms, foyers, and accent walls.
- Requires sealing to maintain its appearance.
- Vinyl Tiles:
-
- Characteristics:
-
- Affordable and easy to install.
- Resistant to water, stains, and scratches.
- Available in a variety of styles, including wood and stone looks.
- Comfortable underfoot and suitable for high-moisture areas.
- Quarry Tiles:
-
- Characteristics:
-
- Made from unglazed clay, providing a natural appearance.
- Durable and resistant to moisture.
- Commonly used in outdoor and high-traffic areas.
- Available in earthy tones and simple designs.
- Cement Tiles:
-
- Characteristics:
-
- Handmade tiles with colorful patterns and designs.
- Durable and suitable for floors, walls, and backsplashes.
- Require sealing to protect against stains.
- Adds a touch of artisanal and vintage charm to spaces.
Steps of Preparing Your Shower Floor for Tiling
Before laying a single tile, proper preparation is key. This section provides a detailed breakdown of the steps involved in preparing your shower floor, including surface cleaning, leveling, and addressing any existing issues that may impact the tiling process.
Tips for Ensuring a Water-Tight Foundation
Achieving a water-tight foundation is crucial for the longevity of your shower floor. Learn valuable tips on waterproofing techniques and ensuring that your shower floor provides a reliable barrier against moisture infiltration.
Tiling Techniques: From Theory to Practice
Step-by-Step Guide to Laying Tiles
Embark on the practical aspect of your DIY tiling project with a step-by-step guide to laying tiles. From spreading mortar to placing tiles with precision, each stage of the process is explained in detail, ensuring a solid foundation for your shower floor.
How to Achieve Proper Alignment and Spacing
Achieving proper alignment and spacing is an art that contributes to the professional finish of your tiled shower floor. This section provides insights into techniques for ensuring straight lines, consistent gaps, and an aesthetically pleasing tile layout.
Cutting Tiles to Fit Unique Spaces
Not all spaces are uniform, and cutting tiles to fit unique areas is a skill every DIY tiler should master. Explore different methods for cutting tiles, from basic straight cuts to more intricate shapes, ensuring a seamless fit for your shower floor.
Mixing and Applying Mortar the Right Way
Mortar is the adhesive that holds your tiles in place. Understand the correct way to mix and apply mortar to achieve optimal adhesion, ensuring that your tiles adhere securely to the shower floor.
 Grouting and Sealing: The Finishing Touches
Choosing the Right Grout for Your Shower Tiles
The selection of grout is a critical decision in the tiling process. This section guides you through choosing the right type and color of grout that complements your tiles and meets the functional requirements of your shower floor.
The Art of Applying Grout for Long-Lasting Results
Grouting is the final step that transforms individual tiles into a cohesive surface. Learn the art of applying grout, including techniques for smooth application, minimizing excess grout, and achieving a clean finish for long-lasting results.
Sealing Your Tiles: Protecting Against Water and Wear
Sealing your tiles is a crucial step in maintaining their integrity over time. Understand the importance of tile sealer, the right timing for application, and how it acts as a protective barrier against water damage and wear.
Maintenance Tips to Keep Your Tiled Shower Floor Pristine
Preserving the beauty of your newly tiled shower floor requires ongoing maintenance. Discover practical tips for routine cleaning, addressing stains, and ensuring that your tiled surface remains pristine for years to come.
Overcoming Challenges: Solutions to Common Tiling Problems
Addressing Lippage and Uneven Tile Surfaces
Even with careful planning, challenges may arise. Learn how to address lippage (uneven tile surfaces) and employ corrective measures to ensure a smooth and visually appealing tiled shower floor.
Dealing with Mold and Mildew in Grout Lines
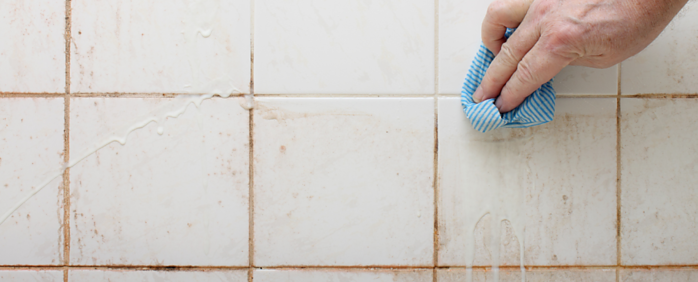
Mold and mildew can be persistent issues, especially in wet areas like showers. This section provides effective strategies for preventing and addressing mold and mildew in grout lines, ensuring a hygienic environment.
How to Repair Cracked Tiles and Grout
In the unfortunate event of cracked tiles or grout, knowing how to address these issues promptly is essential. Explore step-by-step solutions for repairing cracked tiles and grout, restoring the integrity of your shower floor.
Preventive Measures to Avoid Future Tiling Issues
The best way to address problems is to prevent them. This section offers preventive measures and tips to avoid common tiling issues, ensuring the longevity and durability of your beautifully tiled shower floor.
Your DIY shower tile journey is an exciting endeavor, and by understanding the basics, preparing diligently, and mastering the techniques involved, you can achieve a professionally tiled shower floor that enhances both the functionality and aesthetics of your bathroom. Always remember to take your time, follow safety guidelines, and revel in the satisfaction of transforming your space with your own hands.
1. Preparation:
a. Surface Preparation:
– Ensure the surface is clean, dry, and free of any debris or contaminants.
– Repair any cracks or imperfections using a suitable patching compound.
– If tiling over existing tiles, ensure they are securely attached and clean.
b. Layout Design:
– Plan the tile layout, starting from the center of the room for a symmetrical look.
– Use chalk lines or other layout tools to create guidelines for tile placement.
2. Measuring and Cutting:
a. Measurements:
– Measure the space accurately to determine the number of tiles needed.
– Account for any irregularities or obstacles in the layout.
b. Cutting Tiles:
– Use a tile cutter or wet saw to make straight cuts.
– For curved or irregular cuts, use tile nippers or a tile saw with a diamond blade.
– Double-check measurements before making any cuts.
3. Applying Mortar:
a. Mixing Mortar:
– Follow the manufacturer’s instructions for mixing mortar.
– Achieve a consistency similar to peanut butter.
b. Applying Mortar:
– Use a notched trowel to spread mortar evenly on a small area.
– Work in small sections to prevent the mortar from drying before placing tiles.
– Create straight, parallel lines in the mortar using the notched edge of the trowel.
4. Placing Tiles:
a. Tile Placement:
– Press each tile firmly into the mortar, twisting slightly to ensure good adhesion.
– Use tile spacers to maintain consistent gaps between tiles for grouting.
– Align tiles with the layout guidelines for a polished appearance.
b. Checking Alignment:
– Periodically use a level to check that the tiles are even and aligned.
– Adjust tile placement as needed before the mortar sets.
5. Grouting:
a. Mixing Grout:
– Follow the manufacturer’s instructions for mixing grout.
– Achieve a smooth, lump-free consistency.
b. Applying Grout:
– Use a rubber float to press grout into the spaces between tiles.
– Hold the float at a 45-degree angle and move diagonally to avoid pulling grout from the joints.
– Work in small sections and clean excess grout from the tile surface immediately.
6. Cleaning and Sealing:
a. Initial Cleaning:
– Allow the grout to set for the recommended time before cleaning.
– Use a damp sponge to remove grout haze from the tile surface.
– Wipe tiles clean with a dry cloth.
b. Sealing (if necessary):
– Some types of tiles and grouts may require sealing to prevent staining.
– Follow the manufacturer’s recommendations for the specific sealer used.
7. Final Checks:
a. Inspecting the Installation:
– Check for any visible irregularities, misalignments, or issues.
– Address any immediate concerns before the installation fully sets.
b. Curing Time:
– Allow the tiles and grout to cure completely before exposing them to heavy traffic or moisture.
8. Finishing Touches:
a. Applying Caulk:
– Use silicone caulk to seal gaps between tiles and surfaces, especially in corners and edges.
– Ensure a clean and smooth application for a professional finish.
b. Final Cleanup:
– Wipe down the entire tiled surface to remove any remaining residues.
– Polish tiles if needed, and ensure a pristine, finished appearance.
Congratulations! You’ve successfully completed the process of laying tiles. Always follow manufacturer guidelines, wear appropriate safety gear, and take your time to achieve a high-quality result.
